I am just a little excited for the Christmas season. We put up our tree this weekend and the smell is heavenly.
Growing up, we liked to pick a theme or color scheme for the tree each year and do something fancy with it. That is what happens when the girls plan the Christmas decorating. But since we've been married, John has insisted on multicolored lights, a multicolored star, and a variety of multicolored ornaments. I'll admit that I thought it was a bit cheesy at first, and John has since said that I could do the tree how I wanted (though that would require buying all new lights and ornaments, which we can't afford), but our eclectic tree has grown on me.We try to pick up Christmas ornaments to represent the places we've gone and the things we have done together, so decorating the tree is like a walk down memory lane.
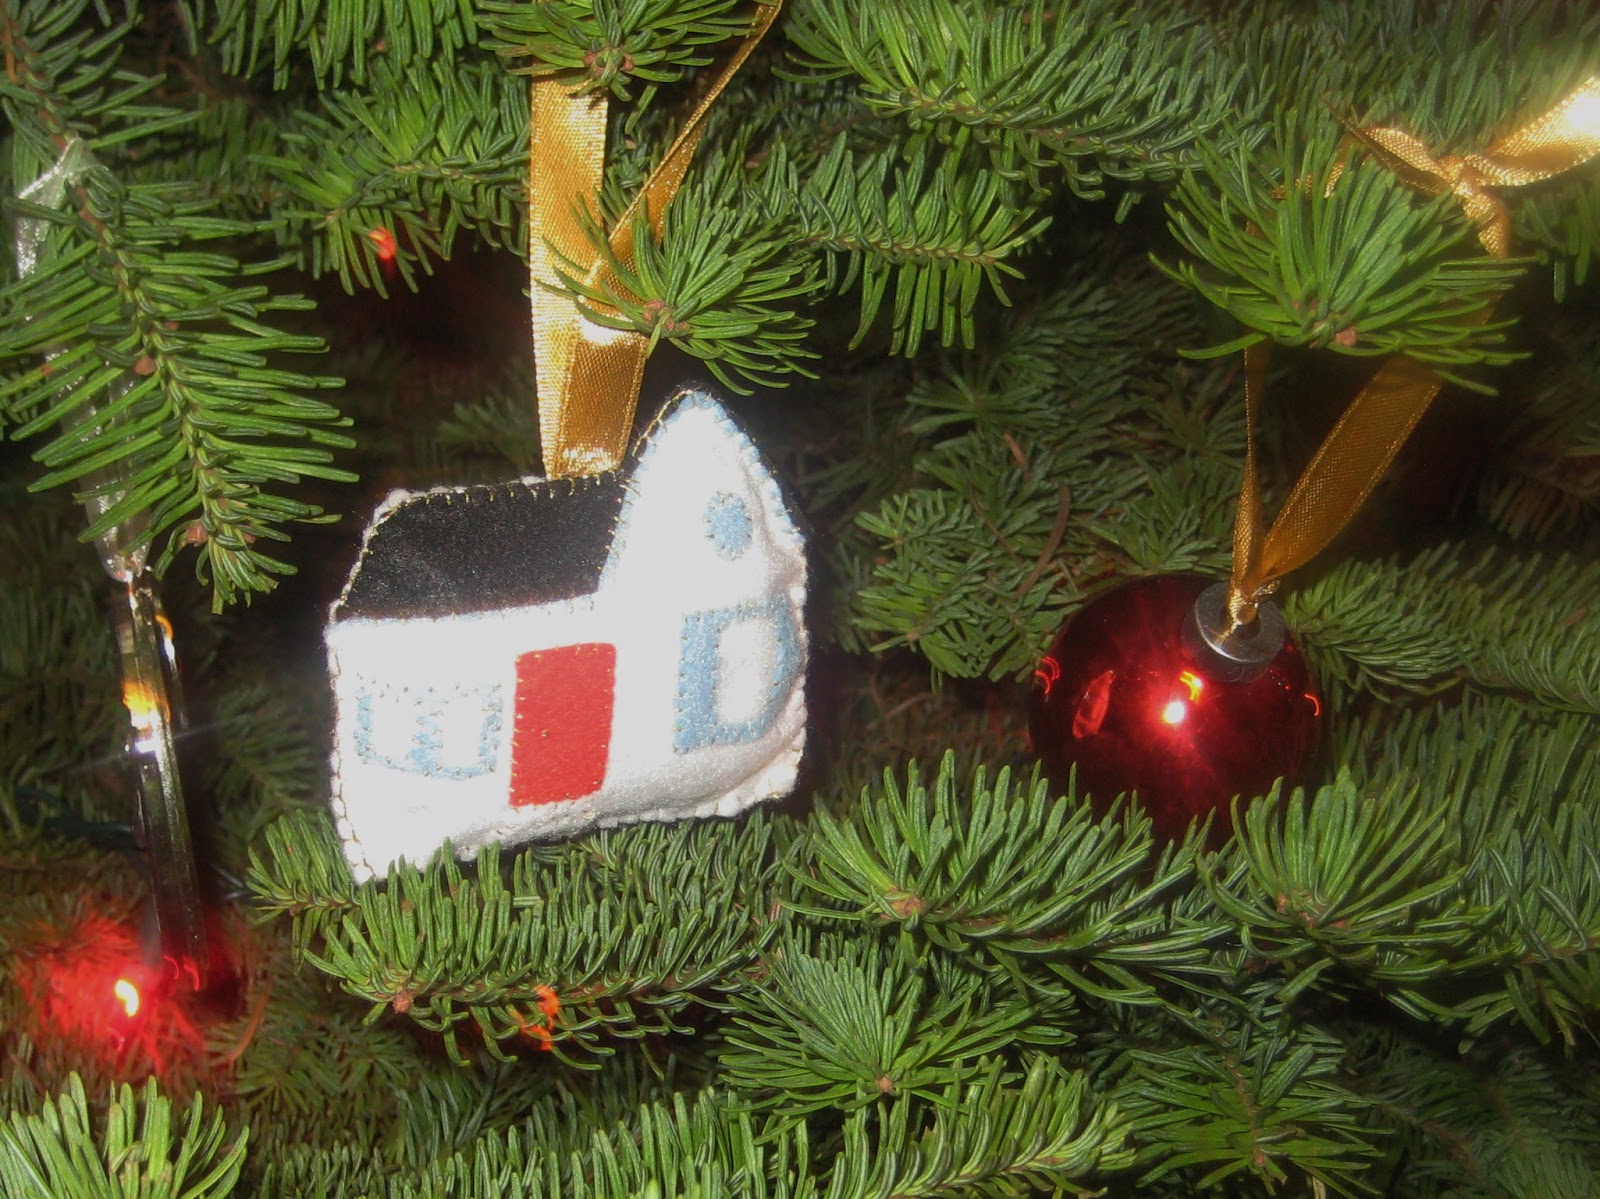
Last year I wanted ornaments to commemorate John starting med school and us buying our house, but couldn't find anything that I liked, let alone that we could afford. So I decided to get crafty in the name of Christmas, and made up some felt ornaments that were exactly what I wanted. They are super easy to make, if a little time consuming. Just cut out two of your chosen shape (one for the front and one for the back). Then cut out the shapes you'll need to adorn your ornament and sew them onto the front. when you are done, use a blanket stitch to attach the front and back pieces together and a hanging ribbon to the top, stopping before you close it all the way to add a little stuffing to give your ornament some dimension. Ta-da!
I used gold thread because I thought it gave the ornaments a more vintage, Christmasey (that is a word, right?) feel. They remind me of my grandmother's old felt ornaments that we had on our tree growing up. On the back of the first ornament, I embroidered (in my sloppy way) "First white coat, 2011," and on the back of the second, "Our first house" and our address.
And as an added bonus, these ornaments are fairly toddler-proof (knock on wood), which is essential in this house. We have already lost three ornaments this year, and the tree has only been decorated for just over 24 hours.
I am already brainstorming what ornaments I will make this year, and I have a few other projects up my sleeve to share here soon.
Showing posts with label Sewing. Show all posts
Monday, November 26, 2012
Friday, November 2, 2012
Meg vs. Halloween: Big Tee to Totoro (or any animal!)
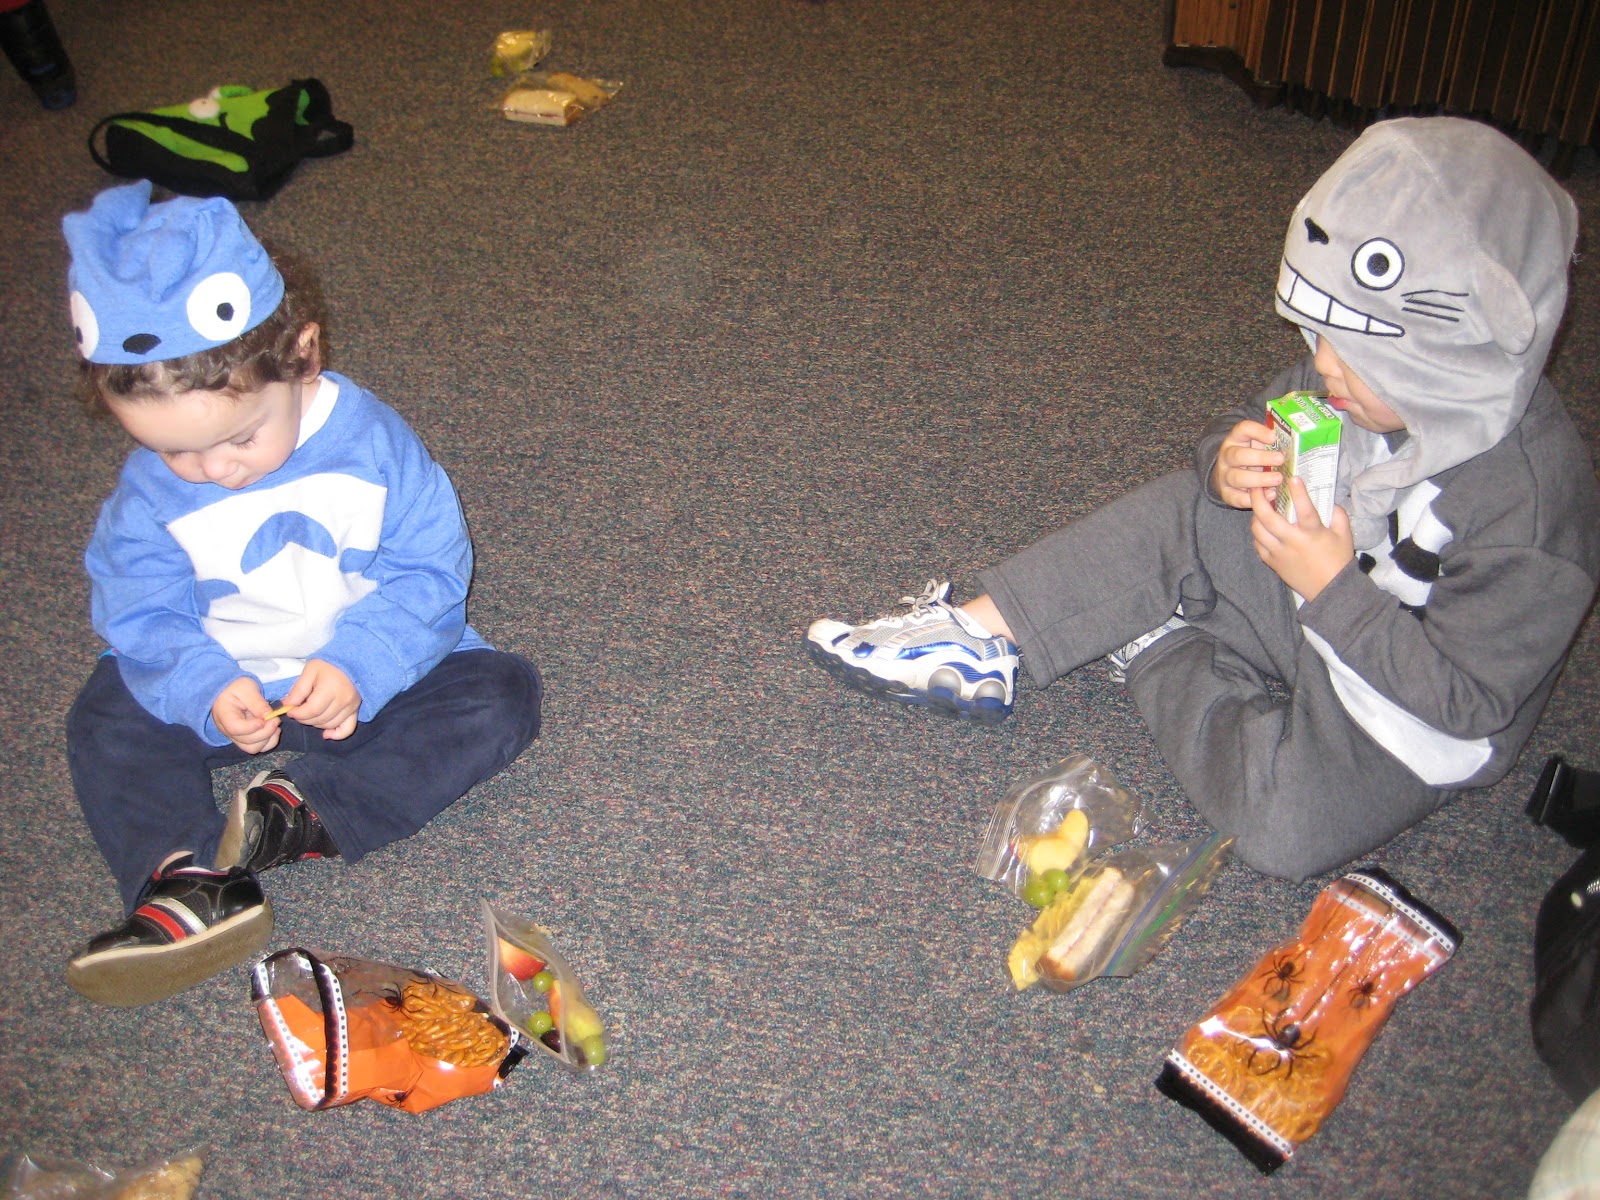
I meant to post this before Halloween, but you know how those things go. In true Japanese form, my kiddos love the movie My Neighbor Totoro
I thought that a Totoro costume would be easy to pull off, and Big Brother already had this Totoro Hat
I wanted it to be a bit big, since I wouldn't have matching pants and the character is kind of round. So I grabbed a hoodie to use for my pattern.
First I cut new, shorter sleeves from the old sleeves.
Next, I folded the hoodie and the shirt in half, laid the hoodie down, and cut around it.
I laid it all out to make sure the sleeves would fit the curve for the arm holes.
Then I sewed the sleeves back to the shirt, sewed up the sides, and hemmed the bottom.
I had this band from the bottom hem, out of which I cut my hat.
With some felt and a few extra tee shirt scraps, I appliqued on the little Totoro's eyes, nose, and tummy, and I was done! It really was a quick project, and you could easily do any number of animals the same way.
My little fellows were happy with the results! (Even if I did make the hat too small; my kids have really big heads.)
Happy Halloween! On to Thanksgiving fun, then Christmas! Eek!
Tuesday, October 23, 2012
Meg vs. Halloween: Easy Felt Bat Garland
Halloween is the first major holiday since my birthday, so I had to start out right if I am going to meet my goal of decorating for all of them. But I wanted to do it (1) without spending much if any money, and (2) without accruing bulky items that we will have to store or move later. So when I saw this bat garland on Pinterest, I knew it would be perfect!
I ordered a whole pile of felt for a felt board project I am hoping to get started on (on sale for $3 a yard at JoAnn.com!), and I had black thread already, so all I needed was to print out this template from Country Living and grab my scissors and sewing machine! Without all of the inevitable interruptions from my three little guys, I would guess that this is about a one-hour project, depending on how crazy you go cutting out bats. I cut out twenty bats, then ran them through the sewing machine one after the other to connect them all together.
We hung it out on the porch, and with our pumpkins I think it looks every-so-slightly festive. It also reminded me how much we still need to do on the house (cracks, peeling paint, fake bricks falling off...). But hey, I kept with my goal! And just maybe I'll make something more with the kiddos in the next week. We like to be last-minute around here.
I like that this garland is reusable but takes up almost no storage space, so we will have a start on our decorating next year! But these beauties won't last that long...
Just the right sizes for my three munchkins. Stay tuned for a couple more Halloween posts before the big day! Then perhaps I'll get a more timely start on Christmas!
I ordered a whole pile of felt for a felt board project I am hoping to get started on (on sale for $3 a yard at JoAnn.com!), and I had black thread already, so all I needed was to print out this template from Country Living and grab my scissors and sewing machine! Without all of the inevitable interruptions from my three little guys, I would guess that this is about a one-hour project, depending on how crazy you go cutting out bats. I cut out twenty bats, then ran them through the sewing machine one after the other to connect them all together.
We hung it out on the porch, and with our pumpkins I think it looks every-so-slightly festive. It also reminded me how much we still need to do on the house (cracks, peeling paint, fake bricks falling off...). But hey, I kept with my goal! And just maybe I'll make something more with the kiddos in the next week. We like to be last-minute around here.
I like that this garland is reusable but takes up almost no storage space, so we will have a start on our decorating next year! But these beauties won't last that long...
Just the right sizes for my three munchkins. Stay tuned for a couple more Halloween posts before the big day! Then perhaps I'll get a more timely start on Christmas!
Thursday, August 30, 2012
Meg vs. The Nursery: Sporty Bunting
Sorry this is a little late in coming...
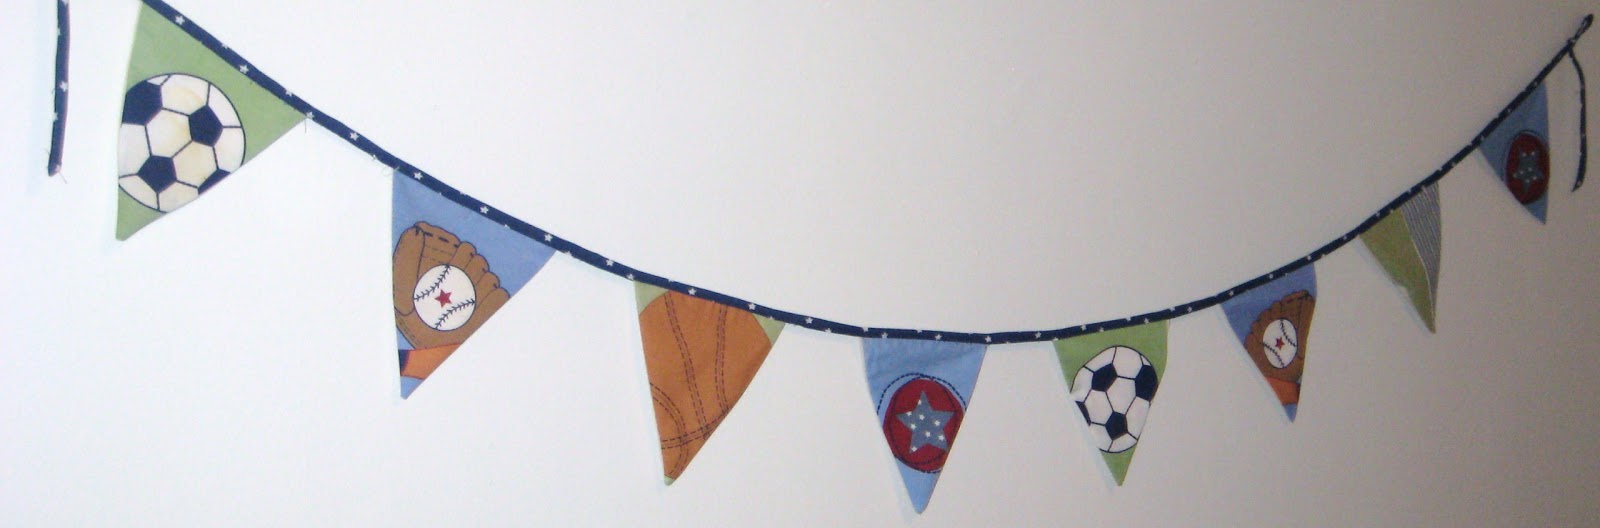
I used the rest of my old crib bumper and wall quilt to put together a little bunting decoration for the nursery wall, since it is still completely bare. It was really pretty easy, and the thing that took me the longest, as usual, was getting around to putting it up. But I finally remembered while the little guy was awake today, and so here it is:
I am really pleased with it, especially considering that it was fast and FREE. There is a good tutorial over here at Make it Do on how to make your own, but I have to admit that I was a lot lazier with mine, didn't make a template for cutting the triangles, and didn't pin anything. That's how I roll. Which is why I will forever remain a beginner seamstress. I am fine with that most of the time, though I felt a bit sheepish when I saw this bunting on the same blog.
But hey--I am a beginner who is one step closer to having an actual nursery, and not just an empty room that happens to have a crib in it.
P.S. See that chair in the corner? I stood on it to hang the bunting, and it totally broke. That makes a pregnant girl feel really good about herself. I should have known better; it is our second cheap Ikea chair to break and I think the others are on their way out...
I used the rest of my old crib bumper and wall quilt to put together a little bunting decoration for the nursery wall, since it is still completely bare. It was really pretty easy, and the thing that took me the longest, as usual, was getting around to putting it up. But I finally remembered while the little guy was awake today, and so here it is:
I am really pleased with it, especially considering that it was fast and FREE. There is a good tutorial over here at Make it Do on how to make your own, but I have to admit that I was a lot lazier with mine, didn't make a template for cutting the triangles, and didn't pin anything. That's how I roll. Which is why I will forever remain a beginner seamstress. I am fine with that most of the time, though I felt a bit sheepish when I saw this bunting on the same blog.
But hey--I am a beginner who is one step closer to having an actual nursery, and not just an empty room that happens to have a crib in it.
P.S. See that chair in the corner? I stood on it to hang the bunting, and it totally broke. That makes a pregnant girl feel really good about herself. I should have known better; it is our second cheap Ikea chair to break and I think the others are on their way out...
Monday, August 27, 2012
Meg vs. the Bedroom: DIY Gathered Headboard
As I hinted a week or two ago, this project started a while back and was going nowhere (in part because I realized our staple gun was several hundred miles away and had to be sent to us, but mostly because I was angry with my sewing machine, er, my lack of sewing patience), so I bagged it for a while. It is so hard to pull out a project once you put it away! But I forced myself to do it. It helped that the alternative was doing the dishes and cleaning the house. I will always avoid that.
Background story: We bought a mattress, a box spring, and four wooden feet at Ikea when we got married. We figured any real bed we could afford would not survive the moves we knew we would be making during our first few years of marriage (sure enough, it has been five years, and we have moved 7 times or so--I'm losing track). We never really decorated beyond a couple of propped on our dresser or on shelves (I never felt like making holes only to fill them a few months later). Now that we have our own place, I am itching to make it feel like we have settled down, though for all I know we may be moving again in a matter of months. So I had to make something easy, inexpensive, and portable.
Enter seven bazillion headboard tutorials on Pinterest.
I actually think that number is a low estimate. Apparently everyone makes their own headboards these days. Why not me?
I decided I wanted something soft (no old window panes or barn doors) that had some visual interest but wasn't overwhelming, since I am going for a calm, neutral, airy feel.
My materials:
*1 plywood sheet, cut to 4 feet by 5 feet (we have a queen bed, which is five feet wide, and I decided I wanted the headboard four feet high. I actually think I might have liked it better a little lower, but perhaps I just need to adjust to having anything there at all.),
*1 piece of upholstry foam, 2 feet by 6 feet, bought at the only fabric store in town.
*2 yards of silvery grey fabric that I initially bought to cover a bulletin board in our church nursery, until the nursery leader decided she wanted to do something different.
*Spray adhesive
*Staple gun and staples
I wanted to sew ruffles at regular intervals across the fabric, and had read about a thousand different "super easy" ruffle tutorials so I thought this would be relatively simple. Not so. For the life of me I could not get this very large piece of fabric to gather nicely when I did the pull-the-bottom-thread technique, and then I couldn't get it to stay ruffled when I tried to go over it again to fix it in place. My matching thread was apparently junk and kept breaking, so I would have to start over again. I don't really know how to use my sewing machine, so I kept messing things up. Finally I just went with the only idiot ruffle technique that I can manage. The down side to this technique is that you can't control the final length of the ruffle. The up side is that I can actually pull it off. And I lucked out that it gave me just the right width, which was a little more than half of the original width of the fabric.
I have no pictures because I was far too angry at the universe and was wanting to trash the whole thing, so I apologize for that. Here is the technique:
1. Set the tension on your sewing machine as tight as you can (my tension dial goes up to 9, so I set it at a 9. I don't really know what that means, and have never cared to figure it out).
2. Set your machine to the longest possible stitch.
3. Feed the fabric through like normal, and the machine will do the ruffling for you.
I ended up doing half of the gathers with my matching thread, then going back and fixing all the broken spots and doing the rest with my more sturdy white thread. Luckily the clashing thread isn't too noticeable.
Next I got out my board and put it together. This took all of about 10 minutes, in part because, as you will see, I did not pick up the toy room before I began. What can I say? I have no shame.
I sprayed both the top of the board and the back of the foam with adhesive and stuck them together, like so.
Next I pulled the foam around the sides and stapled it down thusly,
resulting in this:
I draped my gathered fabric over the top (it has character, doesn't it? [That is poor code for it is crooked and poorly done]),
I stapled the fabric around the back,
added a few staples at the bottom on the front, and ta-da!
I hauled it into our room and shoved it between the bed and the wall. At some point we will probably secure it to the wall, but it isn't as wobbly as I would have expected.
Now remember, our bed used to look like this:
Now it looks like this:
Better, right? The effect would be superior if I took a broader picture of the room, but I'll just come out and say I didn't feel like cleaning so I just cropped it out. Still, don't look closely; I think you can see some shoes and a baby hoodie halfway under the bed. Headboard! That's what we want to see!
I honestly don't think this is going to be a keeper in the long term just because the sewing job is bad and the gathers will come undone over time. But for the now it fits the bill, the price was right, and I am really happy that it actually came out just as I envisioned it.
Friday, August 17, 2012
Meg vs. The Nursery: Curtain Extension
Thursday goal? Ha! Let's forget any goal that requires me to move anything in the garage or reach anywhere awkward...indefinitely. But the day didn't go to waste! I had a problem with the curtains I had for the baby room:
These red stripey curtains were one of the first things I made for our first apartment after we got married, and I purposely picked something that would coordinate with a sports theme because I knew that was what John would want for any boys we had. Clearly our windows were shorter. I dug through my pile of nursery things to see how I could alter the curtains instead of chucking them, and I came across this beauty:
A wall quilt we have never used. With stars on the back.
Aaaaand now those stars are on the bottom of my curtains.
Patriotic, don't you think? If you are ever at my house, please don't look at the actual stitching. I am such a lazy seamstress, and I did a terrible job. But my toddler doesn't seem to care, and I don't think #3 will care when the room becomes his.
The quilt also left me with a nice length of blue starry edging that I am going to use for my bunting. I did go shopping for fabric, but I didn't find anything I liked, so I am planning on using scraps from the bumper and wall quilt to do the job. I figure it's economical, and it will all match! It is nice to feel like one room in the house is coming together, even if I have zero idea what to do with the rest of the house.
These red stripey curtains were one of the first things I made for our first apartment after we got married, and I purposely picked something that would coordinate with a sports theme because I knew that was what John would want for any boys we had. Clearly our windows were shorter. I dug through my pile of nursery things to see how I could alter the curtains instead of chucking them, and I came across this beauty:
A wall quilt we have never used. With stars on the back.
Aaaaand now those stars are on the bottom of my curtains.
Patriotic, don't you think? If you are ever at my house, please don't look at the actual stitching. I am such a lazy seamstress, and I did a terrible job. But my toddler doesn't seem to care, and I don't think #3 will care when the room becomes his.
The quilt also left me with a nice length of blue starry edging that I am going to use for my bunting. I did go shopping for fabric, but I didn't find anything I liked, so I am planning on using scraps from the bumper and wall quilt to do the job. I figure it's economical, and it will all match! It is nice to feel like one room in the house is coming together, even if I have zero idea what to do with the rest of the house.
Thursday, August 16, 2012
Meg vs. The Nursery: DIY Crib Bumper to Rail Bumper
Wednesday: Attempt to turn the crib bumper into a rail guard.
Let's just forget about that Tuesday goal. I did as much sanding as I could reach, but the dust, the sauna that is that bathroom, and my belly were not all getting along.
On to today! I actually did it! Since the doctors of the universe have turned anti-bumper, I thought I would repurpose ours tohide the crib scars from our baby beaver protect the next child's mouth and gastrointestinal tract:
As you can tell, my kids have a lot of teeth.
So I started with this lovely fellow.
There were seams at each corner of the crib, so it was easy to figure out where to cut so that I would have a strip long enough for one side.
Before cutting, I picked the piping off of the next section with a seam ripper so that I could fold it down and use it to cover that exposed edge, like so:
Then I sewed down the edge, spread out the ties (I only needed one tie on each side now instead of two), and I was done!
Repeat for the other side, then tie that bad boy on. Ta-da!
P.S. This bumper was actually part of a set, but little brother refuses to sleep on anything that isn't minky soft just like his blankie and so the non-sporty sheet. And I have no clue where the matching crib skirt went; I'll have to find it before I finish this nursery makeover. I am so stinking organized I kill myself sometimes.
P.P.S.S. I also started a headboard project today. It was one disaster after another. Good thing I had this project to post, because until I started writing I was very crabby. In fact, I think John is still afraid to talk to me. I should probably go apologize now. Now if my room never has a headboard, you will know why.
Let's just forget about that Tuesday goal. I did as much sanding as I could reach, but the dust, the sauna that is that bathroom, and my belly were not all getting along.
On to today! I actually did it! Since the doctors of the universe have turned anti-bumper, I thought I would repurpose ours to
As you can tell, my kids have a lot of teeth.
So I started with this lovely fellow.
There were seams at each corner of the crib, so it was easy to figure out where to cut so that I would have a strip long enough for one side.
Before cutting, I picked the piping off of the next section with a seam ripper so that I could fold it down and use it to cover that exposed edge, like so:
Then I sewed down the edge, spread out the ties (I only needed one tie on each side now instead of two), and I was done!
Repeat for the other side, then tie that bad boy on. Ta-da!
P.S. This bumper was actually part of a set, but little brother refuses to sleep on anything that isn't minky soft just like his blankie and so the non-sporty sheet. And I have no clue where the matching crib skirt went; I'll have to find it before I finish this nursery makeover. I am so stinking organized I kill myself sometimes.
P.P.S.S. I also started a headboard project today. It was one disaster after another. Good thing I had this project to post, because until I started writing I was very crabby. In fact, I think John is still afraid to talk to me. I should probably go apologize now. Now if my room never has a headboard, you will know why.
Wednesday, August 8, 2012
Meg vs. Maternity Wardrobe: Easy skirt updates
In the interest of getting started on my 30 by 30 list, I tackled a couple of maternity skirts that I rarely wore because I didn't like the fit. I knew they were easy fixes if I just took a little time with the sewing machine, but of course I put it off until 2 months before baby is due! Regardless, it is nice to have a little change in my limited maternity wardrobe, and if I can do this, anyone can.
Makeover #1:
(Note the appearance of toys on my bed in the after shots. It was futile trying to keep them out.) This was technically not a maternity skirt, but when I bought it I needed something quick, it had an elastic waistband, and it was on clearance for about $4 at Target; the perfect storm for buying something I didn't really like and that was really the wrong size. Since the waist fit comfortably, I just decided how far in I wanted the bottom of the skirt taken in, pinned it and made sure that I was taking in the same amount on both sides, and sewed a straight line from the waist to the hem. I also took the opportunity to lengthen the skirt a smidge by letting down the original hem as much as possible--a little over an inch. Serious improvement, right? No more saggy, baggy, shapeless blob skirt here.
Makeover #2:
Makeover #1:
(Note the appearance of toys on my bed in the after shots. It was futile trying to keep them out.) This was technically not a maternity skirt, but when I bought it I needed something quick, it had an elastic waistband, and it was on clearance for about $4 at Target; the perfect storm for buying something I didn't really like and that was really the wrong size. Since the waist fit comfortably, I just decided how far in I wanted the bottom of the skirt taken in, pinned it and made sure that I was taking in the same amount on both sides, and sewed a straight line from the waist to the hem. I also took the opportunity to lengthen the skirt a smidge by letting down the original hem as much as possible--a little over an inch. Serious improvement, right? No more saggy, baggy, shapeless blob skirt here.
Makeover #2:
This skirt fit fine, but I was just tired of the shape, and felt like it made me look wider (again, one big, bumpy blob). Plus I had seen lots of maternity pencil skirts and was on the verge of coveting one. This skirt is essentially constructed of a series of triangles, so all I had to do was take in each seam to make the bottom narrower, like this:
Now to tackle the rest of my clothes pile!
Subscribe to:
Posts (Atom)