Showing posts with label Upcycling. Show all posts

Thursday, January 17, 2013

Meg vs. Babies: Cloth Diapers and DIY Cloth Wipes

I have thought on and off about trying cloth diapering ever since we had our first boy. And now that we are on number three and the diapers keep piling up, I finally decided I needed to go for it. It haunted me that we paid so much, threw so much out, and didn't have something sustainable in case of an emergency.

Thankfully, cloth diapers aren't what they used to be. After looking all over for affordable used cloth diapers on Craigslist and elsewhere, I found Alva Baby, which is a Chinese pocket diaper manufacturer (I know, bad American. But I am a poor American, so this is what I can do). Their new diapers are cheaper than almost any used ones I could find here in the bay area, and they had pretty decent reviews. For about $135, I got 20 diapers (they actually ended up sending me 22 for some reason), 40 inserts (20 that came with the diapers, and another 20 more heavy duty liners with bamboo), a roll of liners, and a wet bag for the diaper pail.

They arrived after about a week, and I washed all the covers and inserts with bumGenius Diaper Detergent that I ordered from Amazon (washed the bamboo ones seperately 3 times in hot water to prep them), and was ready to try them on the boys. Since they have snaps to adjust the size, I can use the same batch for both of my boys in diapers.

I was worried about Mr. 2-year-old being resistant to switching up his Huggies, but he thought these bad boys were pretty fancy.


Then I got to thinking, "Why should I keep buying wipes, too?" So I pulled out my stash of flannel receiving blankets, most of which I received as gifts but haven't used because I have big babies and can't keep a good swaddle with them. I cut three of them up into squares (16 squares per blanket), and folded them tissue-style so they would pop out of my wipes container. Here's a quick how-to on that in case you're curious.

1. Lay out a square, like so:


2. Lay another square overlapping half of the first.


3. Fold the first over the second, like so:


4. Lay down a third where the first one was.


5. Fold the second one over the third one (see where this is going?).


6. Repeat until you get a stack like this:


I put a stack of 48 wipes (three blankets' worth) into an extra wipes container, and then went to work on some wipes solution.

I had pinned this solution a long time ago, but on reviewing it, it seemed like it used a LOT of soap for the amount of water it required. Plus in includes baby oil in it, and I read mixed reviews online about whether you should use baby oil with cloth diapers. I also read reviews from people who said just to use water and forget about adding anything. So I took my own approach, boiled two cups of water, added a squirt of the baby wash I had on hand (I think Johnson & Johnson's shea butter something-or-other), and dumped all over my lovely new wipes. Done!


Note: Due to gravity, more solution will sink to the bottom of the stack, making the bottom wipes soggy and the top wipes dry. I would just flip your stack over once a day to redistribute the solution. I do this with my store-bought disposable wipes on occasion as well.

So far they work fine, and it is kind of nice to have something sturdier than my regular wipes between me and whatever mess I am cleaning up (even if I am then throwing it in a laundry bag instead of the trash).

*Update: I realized after a couple of washes that these wipes would fray, since they are flannel (duh, for anyone who sews regularly; I sew not-so-regularly). So as I have pulled them out of the dryer I have been doing a quick zigzag stitch around the edges to prevent more fraying. Otherwise, a few weeks in and I am still happy with them!

One day in, and I would say that the cloth diapers are only marginally more work than disposables (granted, I haven't washed a load yet, but I have a machine that will do all that work for me!). And here is my take on the eww factor: If you are on your first baby and still kind of grossed out by poo, this can seem a little gross, since you may have to do some rinsing (like for my 4-month-old), and you have to pull wet inserts out of covers, dump big poos into the toilet (for my 2-year-old), etc. But after three boys and potty training, the poo part doesn't really bother me, and it is no grosser than cleaning out the training potty we used for my oldest (seriously, for some reason poop is so much grosser in that little potty than in the diaper. Not sure why.). The cloth diapers have done better at containing the newborn poop (we had a blowout pretty much every time he pooped before), which means that I don't have as many clothes to scrub and soak. And the liners in my 2-year-old's diaper minimize the poo interaction there. But to make things easier, I got this Diaper Sprayer on Amazon for $15 (though it looks like it has gone up in price since then), and am planning to hook it up today.

If I change my mind about this whole cloth diapering thing after a couple of weeks I will let you know, but so far I am pretty happy with it!

Friday, November 9, 2012

Meg vs. Thanksgiving: Thankful Tree

For my second Thanksgiving activity this week, I wanted to do something that would help us to focus on being thankful this month. After my handprint and footprint garland, I had a couple more paper grocery bags and decided to cut out a tree on a whim, to which we could add some fall foliage with things we are thankful for. The trunk took me about a minute to cut out, and then I cut out leaves during my spare minutes throughout the day. Here it is with our first leaves:


I thought it was fun that when I asked Little Brother what he was thankful for, he simply said, "Happy!" That warmed my heart, since ultimately happiness is what I want to give my kids. I think that being thankful is a big part of being happy.

We are planning to each put up something we are thankful for every day until Thanksgiving (or maybe through the end of the month?), so our tree should fill up pretty quickly.

Once the tree was done, the wall still seemed pretty bare, so I thought I would finish it off with a banner. If you read yesterday's post, that lead to an epic hunt for printable buntings and banners that you can customize. Next time the process should be a little easier!

Here it is with the addition of the banner:


Much better! I'm no Martha Stewart, but the whole point is to help my toddlers learn about Thanksgiving and what we should be grateful for, and I think this fits the bill (not to mention that it cost me approximately $0, since I had all the supplies, and many were things I inherited from other people or my mom's work).

What are you thankful for today? I hope you can say "Happy!" too. =)

Friday, November 2, 2012

Meg vs. Halloween: Big Tee to Totoro (or any animal!)


I meant to post this before Halloween, but you know how those things go. In true Japanese form, my kiddos love the movie My Neighbor Totoro . If you haven't seen it, you should! It is so so very cute and fun. A timeless classic.


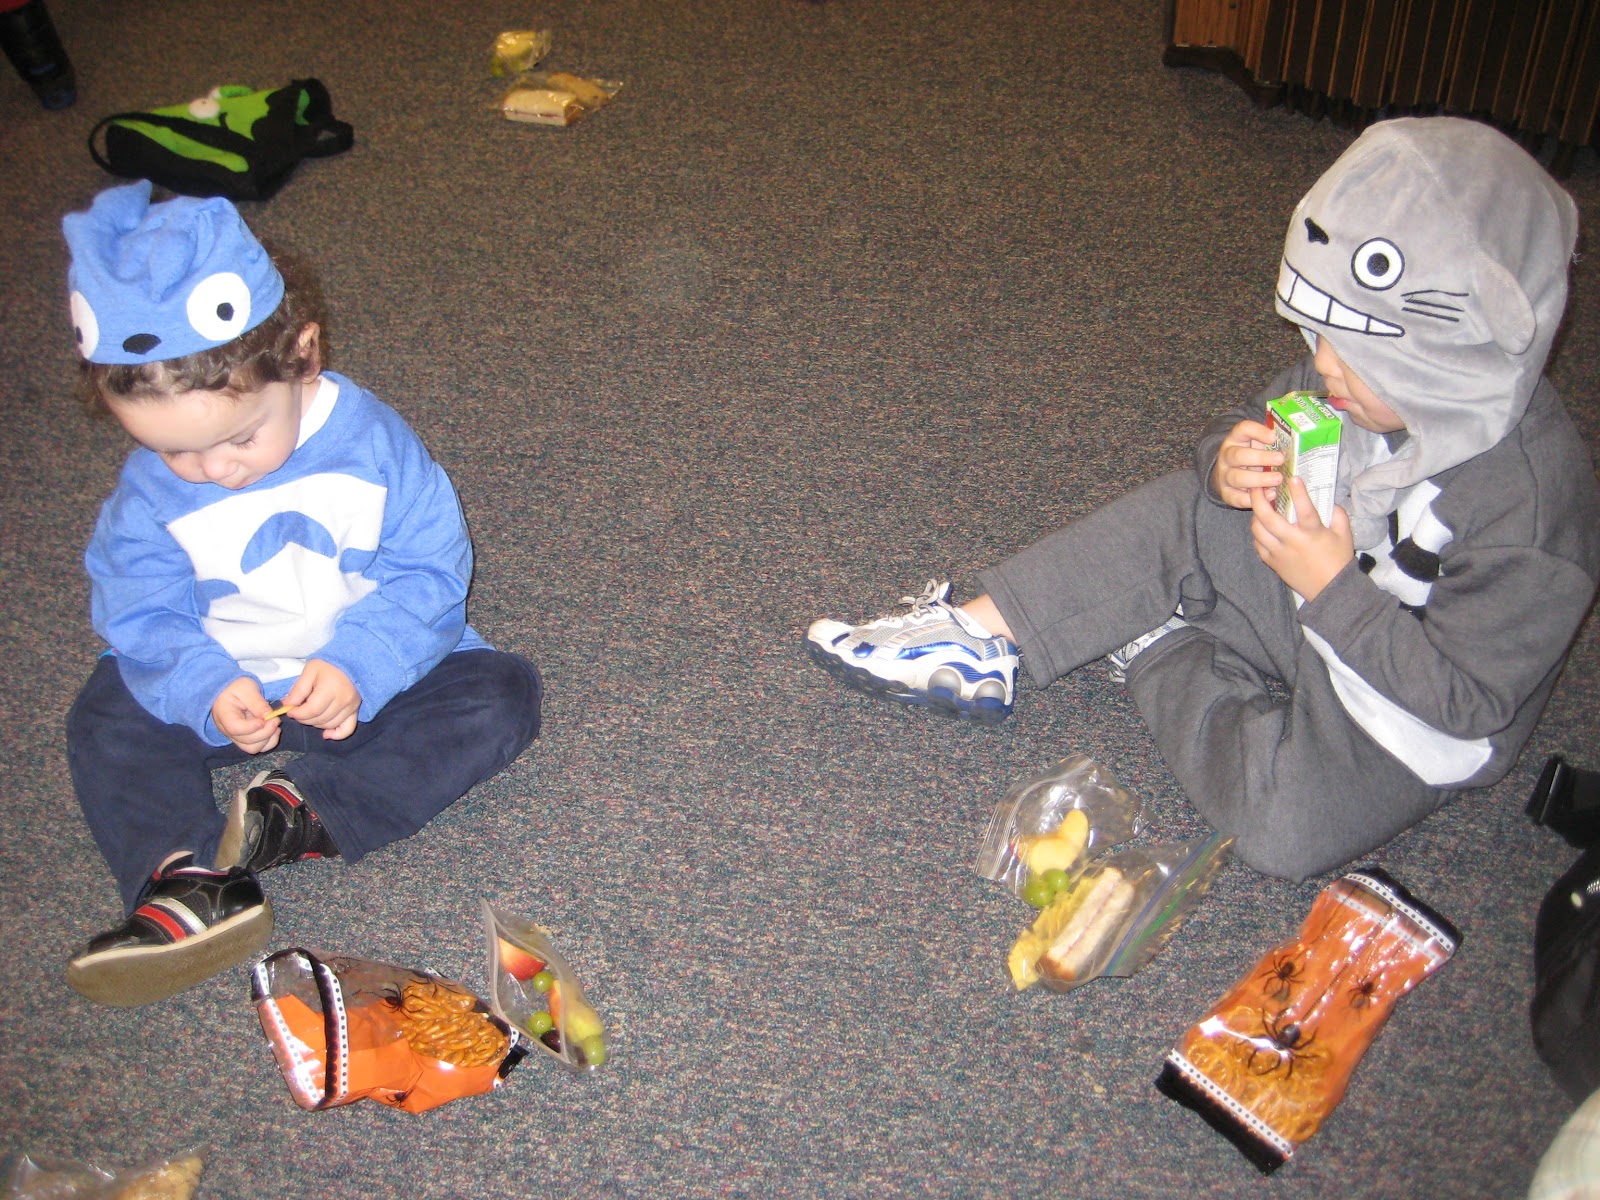
I thought that a Totoro costume would be easy to pull off, and Big Brother already had this Totoro Hat, so I got to work. Big brother was going to be the big grey Totoro, Little Brother would be his little blue friend, and Baby Brother would be a Soot Sprite. Little Brother's costume was the most difficult, because there was no pre-made hat to buy, and I had a hard time finding any plain blue clothing in his size. Finally I came across this boys' XL tee at Wal-Mart, and figured I could work with it.


I wanted it to be a bit big, since I wouldn't have matching pants and the character is kind of round. So I grabbed a hoodie to use for my pattern.

First I cut new, shorter sleeves from the old sleeves.


Next, I folded the hoodie and the shirt in half, laid the hoodie down, and cut around it.


 I laid it all out to make sure the sleeves would fit the curve for the arm holes.

Then I sewed the sleeves back to the shirt, sewed up the sides, and hemmed the bottom.

I had this band from the bottom hem, out of which I cut my hat.


With some felt and a few extra tee shirt scraps, I appliqued on the little Totoro's eyes, nose, and tummy, and I was done! It really was a quick project, and you could easily do any number of animals the same way.


My little fellows were happy with the results! (Even if I did make the hat too small; my kids have really big heads.)


Happy Halloween! On to Thanksgiving fun, then Christmas! Eek!

Saturday, September 1, 2012

Meg vs. The Nursery: Chain Link Baseball Card Frame

I am a little excited about this one because, like my headboard, I actually thought of it myself! Of course, I had a little bit of inspiration via Pinterest...

A couple of weeks ago, I saw this and thought it was super fun:

You can check out all the fun bedroom ideas here at Itsy Bits and Pieces.

I didn't know where to get an old chain link gate, and I had no intention of going to all the effort of trying. So I thought I could make something that brought in a little more color and invoked the sporty feeling of chain link.

Saturday I found this frame at the Habitat ReStore for just a couple of bucks:


I gave it a few coats of red spray paint, then brought it in and turned it over on my table. My toddlers quickly jumped in to help with Toby the steam tram and a Shinkansen car.


I poked thumb tacks in about every three inches around the border of the frame, making sure they were lined up with the tacks on the opposite side. Then I started weaving a chain link with some 1.2 mm steel wire.


I have to admit, the process is super annoying if you are as impatient as I am (which most of you aren't). I suggest just barely poking in the tacks at first to mark your spot, then pushing or hammering them in as far as you can once you have the wire wrapped around it. I found the easiest way to do the weaving was to pre-fold enough wire to go up and down the frame one time so that it looks like this:


Then weave it in and out of the last row and wrap it around the tacks at the end. That may not make sense when you read it, but if you try it and get start it, you'll figure it out pretty quickly. If I can, you can.Here is the finished product from the back. It's plenty uneven and crooked, but once it goes on the wall and the cards go on, it isn't too noticeable.


Next time we head to my in-laws' house we are going to pick out some of John's favorite childhood cards to put up, and in the next few days I'll spray paint the clothespins in coordinating colors, and then we'll be done! To break it in, I had to do my dad proud and order this card on ebay.


You got that right, folks. Hideo Nomo. The only time my Japanese dad ever watched American sports religiously was when he came to LA. Other than that it was all rented videos of sumo championships.


I wonder if they have sumo trading cards in Japan? Hmmm...

Pin It

Thursday, August 30, 2012

Meg vs. The Nursery: Sporty Bunting

Sorry this is a little late in coming...

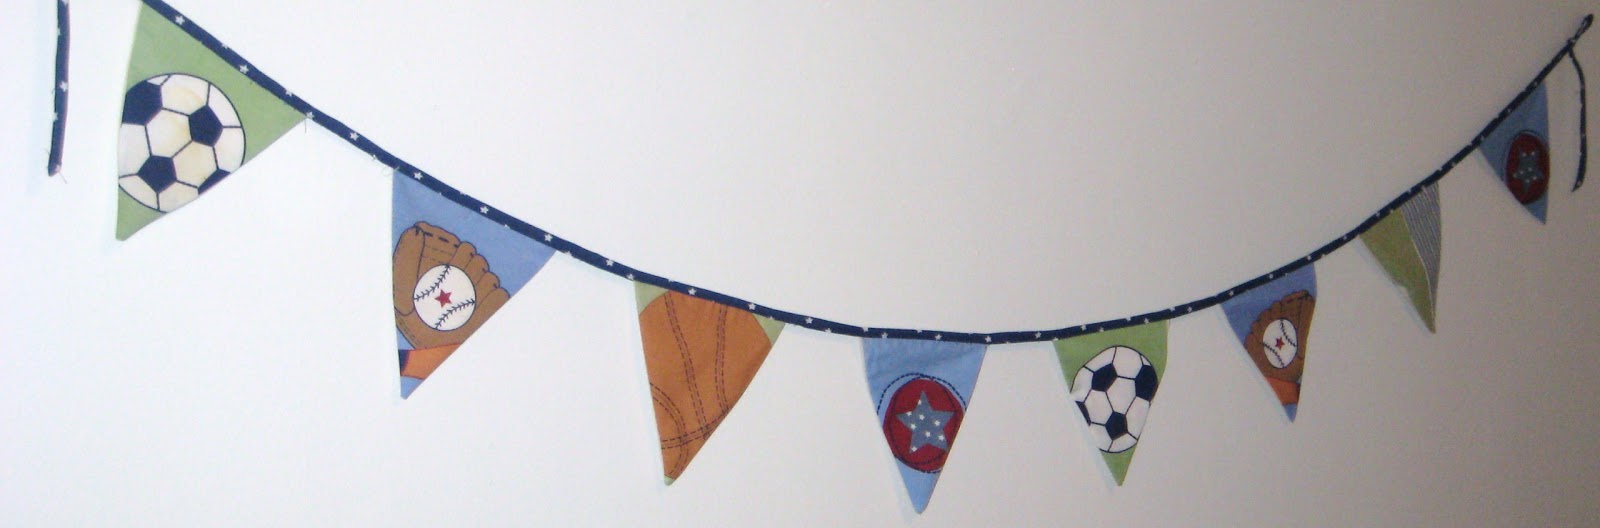
I used the rest of my old crib bumper and wall quilt to put together a little bunting decoration for the nursery wall, since it is still completely bare. It was really pretty easy, and the thing that took me the longest, as usual, was getting around to putting it up. But I finally remembered while the little guy was awake today, and so here it is:


I am really pleased with it, especially considering that it was fast and FREE. There is a good tutorial over here at Make it Do on how to make your own, but I have to admit that I was a lot lazier with mine, didn't make a template for cutting the triangles, and didn't pin anything. That's how I roll. Which is why I will forever remain a beginner seamstress. I am fine with that most of the time, though I felt a bit sheepish when I saw this bunting on the same blog.


But hey--I am a beginner who is one step closer to having an actual nursery, and not just an empty room that happens to have a crib in it.

P.S. See that chair in the corner? I stood on it to hang the bunting, and it totally broke. That makes a pregnant girl feel really good about herself. I should have known better; it is our second cheap Ikea chair to break and I think the others are on their way out...

Wednesday, August 22, 2012

Meg vs. Toddler Entertainment: Cardboard Kitchen

Last week at Costco, my little cook spotted a super awesome kitchen that I would never ever buy for him. He couldn't take his eyes off of it, and kept asking to go back and look at it. For a second I thought, "Maybe I should get him one on Craigslist." Then I remembered all of the cardboard kitchens I had seen on Pinterest, and decided we could be a little creative and have a lot more fun with it. So I told the little Mr. that if he did a good job then we could make him a kitchen during little brother's nap that afternoon.

He was most definitely on his best behavior! As soon as the little fellow was down, we jumped right in and got to work. We still had a couple of moving boxes left in the garage, and we took them apart and turned them inside out so all of the print would be hidden. Add plenty of clear packing tape, a few old CD's, a couple of milk lids (I'll add more as we collect them, which should only take a few days in this house), some twist ties, and a little paint marker, and ta-da! Instant oven.


Cooking commenced immediately.


 Next we made the sink cabinet. Here are the action shots that my 3-year-old took of the process:


Later we picked up a plastic bowl and a frying pan from the dollar store, and we were all set.


Of course the kitchen was not complete until it had a refrigerator, and my little chef did not let me forget it. Luckily I found two diaper boxes that fit together just right, so we added that to the array the next day. Here is our finished kitchen!


The little Mr., his little brother, and their cousins cooked up a storm all weekend. I would say that my total time investment was maybe an hour, and the total cost was $2, approximately 1/60 of the cost of the fancy new play kitchen. And we love this one more because we made it together.

Friday, August 17, 2012

Meg vs. The Nursery: Curtain Extension

Thursday goal? Ha! Let's forget any goal that requires me to move anything in the garage or reach anywhere awkward...indefinitely. But the day didn't go to waste! I had a problem with the curtains I had for the baby room:


These red stripey curtains were one of the first things I made for our first apartment after we got married, and I purposely picked something that would coordinate with a sports theme because I knew that was what John would want for any boys we had. Clearly our windows were shorter. I dug through my pile of nursery things to see how I could alter the curtains instead of chucking them, and I came across this beauty:


A wall quilt we have never used. With stars on the back.


Aaaaand now those stars are on the bottom of my curtains.


Patriotic, don't you think? If you are ever at my house, please don't look at the actual stitching. I am such a lazy seamstress, and I did a terrible job. But my toddler doesn't seem to care, and I don't think #3 will care when the room becomes his.


The quilt also left me with a nice length of blue starry edging that I am going to use for my bunting. I did go shopping for fabric, but I didn't find anything I liked, so I am planning on using scraps from the bumper and wall quilt to do the job. I figure it's economical, and it will all match! It is nice to feel like one room in the house is coming together, even if I have zero idea what to do with the rest of the house.