Tonight we had a couple of fellas come over to give us a quote on coating our house with some fancy Coolwall stuff. The whole shebang would include fixing all of the dry rot, cracks, and every imaginable problem with the house's exterior, sealing it, coating it with some kind of superpaint that reflects heat, and pretty much making our house invincible (against water, anyway). It lasts way longer than paint and has a lifetime warranty. I would have loved to have it done; they said they could schedule us in four days and have it done a week after that. The only catch? It would have cost FOURTEEN THOUSAND DOLLARS. Sigh.
I guess it's time to roll up our sleeves, get to work, and prioritize what we will contract out!
In other news, I spent all of 15 minutes over the course of the day putting two coats of chalkboard paint on our board. I also ate too many chocolate chip cookies (John has been making them almost every Sunday--so good, and so bad!) and spent a while hanging upside-down from my couch trying to get the baby to flip, then spent too much time on the internet. I think it's time to go to sleep and and then get a new day started!

Tuesday, September 4, 2012

Monday, September 3, 2012
Meg vs. Myself: Weekly Goals September 3-9
August 27-September 1
Monday:Finish the sewing for the headboard (let's try for a less ambitious goal, shall we?).
Tuesday:Put the headboard together.
Wednesday:Sand, then paint the chalkboard layer on the board.
Thursday:Buy molding for the chalkboard.
Friday: Attach the molding to the chalkboard. Make the hubs figure out how to hang it safely. Clean house because Mom is coming! (Don't worry, Mom, I'm sure I'llleave some dishes, just for you.)
Saturday:Make decisions about framing projects, pick up paint, and start painting.
I didn't manage to get to painting the chalkboard, but I did do more than I expected on my frame projects, and WE POTTY TRAINED THIS WEEK! Started on Tuesday, and had no accidents Saturday and Sunday. That alone would have made me ecstatic about this week. On we go, with 3 weeks left until baby is due! (But 4 weeks until I really expect him to show up...)
September 3-8
Monday:Hang curtains in the boys' room.
Tuesday: Start painting that chalkboard! Get first quote for painting the house.
Wednesday: Finish painting the chalkboard.
Thursday: Spray paint clothespins and frames for the nursery.
Friday: Cut molding, adhere it to the chalkboard.
Saturday: Repaint wainscoting in the living room.
Monday:
Tuesday:
Wednesday:
Thursday:
Friday: Attach the molding to the chalkboard. Make the hubs figure out how to hang it safely. Clean house because Mom is coming! (Don't worry, Mom, I'm sure I'll
Saturday:
I didn't manage to get to painting the chalkboard, but I did do more than I expected on my frame projects, and WE POTTY TRAINED THIS WEEK! Started on Tuesday, and had no accidents Saturday and Sunday. That alone would have made me ecstatic about this week. On we go, with 3 weeks left until baby is due! (But 4 weeks until I really expect him to show up...)
September 3-8
Monday:
Tuesday: Start painting that chalkboard! Get first quote for painting the house.
Wednesday: Finish painting the chalkboard.
Thursday: Spray paint clothespins and frames for the nursery.
Friday: Cut molding, adhere it to the chalkboard.
Saturday: Repaint wainscoting in the living room.
Saturday, September 1, 2012
Meg vs. The Nursery: Chain Link Baseball Card Frame
I am a little excited about this one because, like my headboard, I actually thought of it myself! Of course, I had a little bit of inspiration via Pinterest...
A couple of weeks ago, I saw this and thought it was super fun:

I didn't know where to get an old chain link gate, and I had no intention of going to all the effort of trying. So I thought I could make something that brought in a little more color and invoked the sporty feeling of chain link.
Saturday I found this frame at the Habitat ReStore for just a couple of bucks:

I gave it a few coats of red spray paint, then brought it in and turned it over on my table. My toddlers quickly jumped in to help with Toby the steam tram and a Shinkansen car.

I poked thumb tacks in about every three inches around the border of the frame, making sure they were lined up with the tacks on the opposite side. Then I started weaving a chain link with some 1.2 mm steel wire.

I have to admit, the process is super annoying if you are as impatient as I am (which most of you aren't). I suggest just barely poking in the tacks at first to mark your spot, then pushing or hammering them in as far as you can once you have the wire wrapped around it. I found the easiest way to do the weaving was to pre-fold enough wire to go up and down the frame one time so that it looks like this:

Then weave it in and out of the last row and wrap it around the tacks at the end. That may not make sense when you read it, but if you try it and get start it, you'll figure it out pretty quickly. If I can, you can.Here is the finished product from the back. It's plenty uneven and crooked, but once it goes on the wall and the cards go on, it isn't too noticeable.


Next time we head to my in-laws' house we are going to pick out some of John's favorite childhood cards to put up, and in the next few days I'll spray paint the clothespins in coordinating colors, and then we'll be done! To break it in, I had to do my dad proud and order this card on ebay.

You got that right, folks. Hideo Nomo. The only time my Japanese dad ever watched American sports religiously was when he came to LA. Other than that it was all rented videos of sumo championships.

I wonder if they have sumo trading cards in Japan? Hmmm...

A couple of weeks ago, I saw this and thought it was super fun:
You can check out all the fun bedroom ideas here at Itsy Bits and Pieces.
I didn't know where to get an old chain link gate, and I had no intention of going to all the effort of trying. So I thought I could make something that brought in a little more color and invoked the sporty feeling of chain link.
Saturday I found this frame at the Habitat ReStore for just a couple of bucks:

I gave it a few coats of red spray paint, then brought it in and turned it over on my table. My toddlers quickly jumped in to help with Toby the steam tram and a Shinkansen car.

I poked thumb tacks in about every three inches around the border of the frame, making sure they were lined up with the tacks on the opposite side. Then I started weaving a chain link with some 1.2 mm steel wire.

I have to admit, the process is super annoying if you are as impatient as I am (which most of you aren't). I suggest just barely poking in the tacks at first to mark your spot, then pushing or hammering them in as far as you can once you have the wire wrapped around it. I found the easiest way to do the weaving was to pre-fold enough wire to go up and down the frame one time so that it looks like this:

Then weave it in and out of the last row and wrap it around the tacks at the end. That may not make sense when you read it, but if you try it and get start it, you'll figure it out pretty quickly. If I can, you can.Here is the finished product from the back. It's plenty uneven and crooked, but once it goes on the wall and the cards go on, it isn't too noticeable.


Next time we head to my in-laws' house we are going to pick out some of John's favorite childhood cards to put up, and in the next few days I'll spray paint the clothespins in coordinating colors, and then we'll be done! To break it in, I had to do my dad proud and order this card on ebay.

You got that right, folks. Hideo Nomo. The only time my Japanese dad ever watched American sports religiously was when he came to LA. Other than that it was all rented videos of sumo championships.

I wonder if they have sumo trading cards in Japan? Hmmm...
Thursday, August 30, 2012
Meg vs. The Nursery: Sporty Bunting
Sorry this is a little late in coming...
I used the rest of my old crib bumper and wall quilt to put together a little bunting decoration for the nursery wall, since it is still completely bare. It was really pretty easy, and the thing that took me the longest, as usual, was getting around to putting it up. But I finally remembered while the little guy was awake today, and so here it is:

I am really pleased with it, especially considering that it was fast and FREE. There is a good tutorial over here at Make it Do on how to make your own, but I have to admit that I was a lot lazier with mine, didn't make a template for cutting the triangles, and didn't pin anything. That's how I roll. Which is why I will forever remain a beginner seamstress. I am fine with that most of the time, though I felt a bit sheepish when I saw this bunting on the same blog.

But hey--I am a beginner who is one step closer to having an actual nursery, and not just an empty room that happens to have a crib in it.
P.S. See that chair in the corner? I stood on it to hang the bunting, and it totally broke. That makes a pregnant girl feel really good about herself. I should have known better; it is our second cheap Ikea chair to break and I think the others are on their way out...
I used the rest of my old crib bumper and wall quilt to put together a little bunting decoration for the nursery wall, since it is still completely bare. It was really pretty easy, and the thing that took me the longest, as usual, was getting around to putting it up. But I finally remembered while the little guy was awake today, and so here it is:
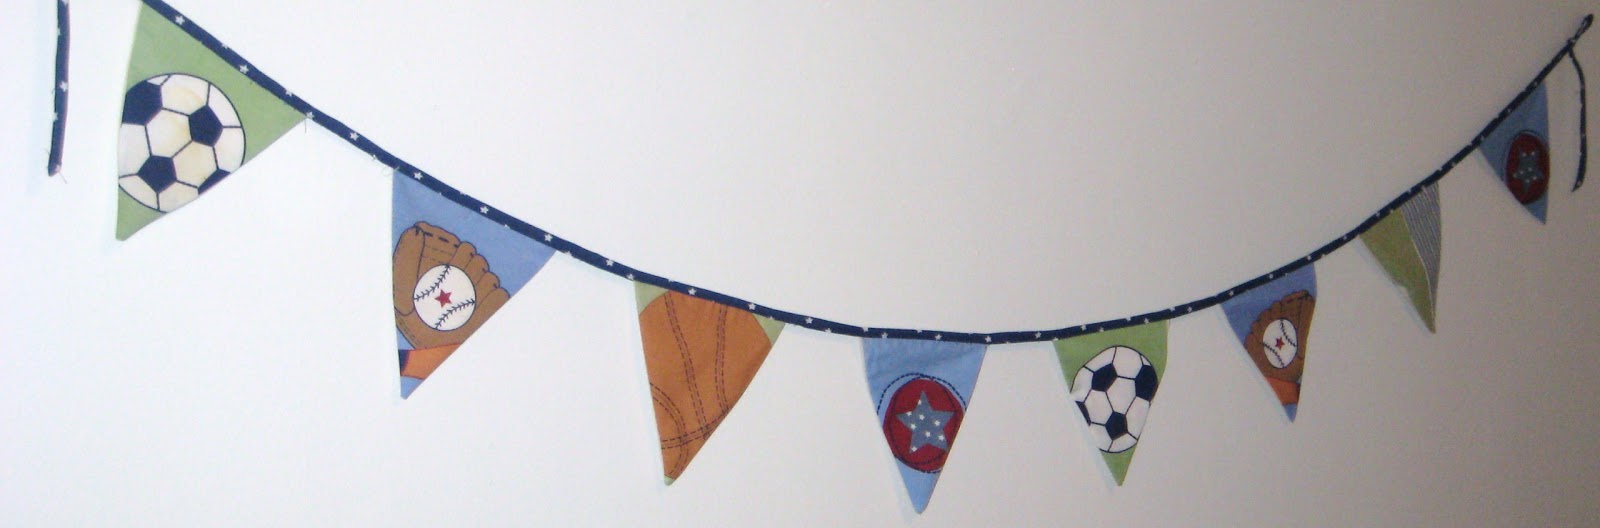
I am really pleased with it, especially considering that it was fast and FREE. There is a good tutorial over here at Make it Do on how to make your own, but I have to admit that I was a lot lazier with mine, didn't make a template for cutting the triangles, and didn't pin anything. That's how I roll. Which is why I will forever remain a beginner seamstress. I am fine with that most of the time, though I felt a bit sheepish when I saw this bunting on the same blog.

But hey--I am a beginner who is one step closer to having an actual nursery, and not just an empty room that happens to have a crib in it.
P.S. See that chair in the corner? I stood on it to hang the bunting, and it totally broke. That makes a pregnant girl feel really good about herself. I should have known better; it is our second cheap Ikea chair to break and I think the others are on their way out...

Monday, August 27, 2012
Meg vs. the Bedroom: DIY Gathered Headboard

As I hinted a week or two ago, this project started a while back and was going nowhere (in part because I realized our staple gun was several hundred miles away and had to be sent to us, but mostly because I was angry with my sewing machine, er, my lack of sewing patience), so I bagged it for a while. It is so hard to pull out a project once you put it away! But I forced myself to do it. It helped that the alternative was doing the dishes and cleaning the house. I will always avoid that.
Background story: We bought a mattress, a box spring, and four wooden feet at Ikea when we got married. We figured any real bed we could afford would not survive the moves we knew we would be making during our first few years of marriage (sure enough, it has been five years, and we have moved 7 times or so--I'm losing track). We never really decorated beyond a couple of propped on our dresser or on shelves (I never felt like making holes only to fill them a few months later). Now that we have our own place, I am itching to make it feel like we have settled down, though for all I know we may be moving again in a matter of months. So I had to make something easy, inexpensive, and portable.
Enter seven bazillion headboard tutorials on Pinterest.

I actually think that number is a low estimate. Apparently everyone makes their own headboards these days. Why not me?
I decided I wanted something soft (no old window panes or barn doors) that had some visual interest but wasn't overwhelming, since I am going for a calm, neutral, airy feel.
My materials:
*1 plywood sheet, cut to 4 feet by 5 feet (we have a queen bed, which is five feet wide, and I decided I wanted the headboard four feet high. I actually think I might have liked it better a little lower, but perhaps I just need to adjust to having anything there at all.),
*1 piece of upholstry foam, 2 feet by 6 feet, bought at the only fabric store in town.
*2 yards of silvery grey fabric that I initially bought to cover a bulletin board in our church nursery, until the nursery leader decided she wanted to do something different.
*Spray adhesive
*Staple gun and staples

I wanted to sew ruffles at regular intervals across the fabric, and had read about a thousand different "super easy" ruffle tutorials so I thought this would be relatively simple. Not so. For the life of me I could not get this very large piece of fabric to gather nicely when I did the pull-the-bottom-thread technique, and then I couldn't get it to stay ruffled when I tried to go over it again to fix it in place. My matching thread was apparently junk and kept breaking, so I would have to start over again. I don't really know how to use my sewing machine, so I kept messing things up. Finally I just went with the only idiot ruffle technique that I can manage. The down side to this technique is that you can't control the final length of the ruffle. The up side is that I can actually pull it off. And I lucked out that it gave me just the right width, which was a little more than half of the original width of the fabric.
I have no pictures because I was far too angry at the universe and was wanting to trash the whole thing, so I apologize for that. Here is the technique:
1. Set the tension on your sewing machine as tight as you can (my tension dial goes up to 9, so I set it at a 9. I don't really know what that means, and have never cared to figure it out).
2. Set your machine to the longest possible stitch.
3. Feed the fabric through like normal, and the machine will do the ruffling for you.
I ended up doing half of the gathers with my matching thread, then going back and fixing all the broken spots and doing the rest with my more sturdy white thread. Luckily the clashing thread isn't too noticeable.
Next I got out my board and put it together. This took all of about 10 minutes, in part because, as you will see, I did not pick up the toy room before I began. What can I say? I have no shame.
I sprayed both the top of the board and the back of the foam with adhesive and stuck them together, like so.

Next I pulled the foam around the sides and stapled it down thusly,

resulting in this:

I draped my gathered fabric over the top (it has character, doesn't it? [That is poor code for it is crooked and poorly done]),

I stapled the fabric around the back,

added a few staples at the bottom on the front, and ta-da!

I hauled it into our room and shoved it between the bed and the wall. At some point we will probably secure it to the wall, but it isn't as wobbly as I would have expected.

Now remember, our bed used to look like this:

Now it looks like this:

Better, right? The effect would be superior if I took a broader picture of the room, but I'll just come out and say I didn't feel like cleaning so I just cropped it out. Still, don't look closely; I think you can see some shoes and a baby hoodie halfway under the bed. Headboard! That's what we want to see!
I honestly don't think this is going to be a keeper in the long term just because the sewing job is bad and the gathers will come undone over time. But for the now it fits the bill, the price was right, and I am really happy that it actually came out just as I envisioned it.

Sunday, August 26, 2012
Meg vs. Myself: Weekly Goals August 27-September 1
Sorry to the three people that read this for not posting all week. As you can see, I have been keeping up pretty well on my projects, but have been a terrible blogger. Reasons? For one, I can't seem to get my house clean enough to take any non-humiliating pictures. Also, once the main projects are done I lose a little motivation to do the finishing touches (e.g. It took me until last night to finally iron the clothes I got at the thrift store so I could post them, and I still haven't gotten to actually hanging up the bunting with anything but painter's tape). And now who knows where my camera is in my mess of a house.
I was just thinking to myself that, three years into being a stay-at-home mom, I still have not managed the adjustment to home life as I would have hoped. I am terrible at doing things without an external deadline, I still hate housework and will latch on to any distraction to avoid it, and I am still terrible at going to bed at a reasonable hour. There is a lot more on that list, but those are the most obnoxious ones right now. The one thing I have gotten good at is not caring about how everyone else is doing in comparison, and appreciating life. I have it good and I'm grateful for the gifts of time and means to make it better. Change is wonderful as long as it is in the right direction.
So who knows? Maybe I'll actually blog next week.
August 20-25
Monday:Go thrifting for frames, etc. Had a better-than-usual trip, and will post about it some time.
Tuesday:Buy backing fabric and finish putting nursery bunting together.
Wednesday:Clean and sand kids' doors for painting. Probably just as well I didn't blog this. Not very exciting.
Thursday:Get blackboard paint tinted. Start painting magnetic layer on the board. This paint is a pain in the rear and reeks to boot. It made me sick. Not sure why I didn't make my husband do it. But I am going to make him pick up the paint thinner to clean up the mess I made...
Friday:Rake, mow, water the lawn. Also, found a wasps' next on the side of our house. Sa-weet.
Saturday: Tackle the headboard project again. Try again next week...
August 27-September 1 (What? September? Not possible. 4 weeks to d-day!)
Monday: Finish the sewing for the headboard (let's try for a less ambitious goal, shall we?).
Tuesday: Put the headboard together.
Wednesday: Sand, then paint the chalkboard layer on the board.
Thursday: Buy molding for the chalkboard.
Friday: Attach the molding to the chalkboard. Make the hubs figure out how to hang it safely. Clean house because Mom is coming! (Don't worry, Mom, I'm sure I'll leave some dishes, just for you.)
Saturday: Make decisions about framing projects, pick up paint, and start painting.
I was just thinking to myself that, three years into being a stay-at-home mom, I still have not managed the adjustment to home life as I would have hoped. I am terrible at doing things without an external deadline, I still hate housework and will latch on to any distraction to avoid it, and I am still terrible at going to bed at a reasonable hour. There is a lot more on that list, but those are the most obnoxious ones right now. The one thing I have gotten good at is not caring about how everyone else is doing in comparison, and appreciating life. I have it good and I'm grateful for the gifts of time and means to make it better. Change is wonderful as long as it is in the right direction.
So who knows? Maybe I'll actually blog next week.
August 20-25
Monday:
Tuesday:
Wednesday:
Thursday:
Friday:
Saturday: Tackle the headboard project again. Try again next week...
August 27-September 1 (What? September? Not possible. 4 weeks to d-day!)
Monday: Finish the sewing for the headboard (let's try for a less ambitious goal, shall we?).
Tuesday: Put the headboard together.
Wednesday: Sand, then paint the chalkboard layer on the board.
Thursday: Buy molding for the chalkboard.
Friday: Attach the molding to the chalkboard. Make the hubs figure out how to hang it safely. Clean house because Mom is coming! (Don't worry, Mom, I'm sure I'll leave some dishes, just for you.)
Saturday: Make decisions about framing projects, pick up paint, and start painting.
Wednesday, August 22, 2012
Meg vs. Toddler Entertainment: Cardboard Kitchen
Last week at Costco, my little cook spotted a super awesome kitchen that I would never ever buy for him. He couldn't take his eyes off of it, and kept asking to go back and look at it. For a second I thought, "Maybe I should get him one on Craigslist." Then I remembered all of the cardboard kitchens I had seen on Pinterest, and decided we could be a little creative and have a lot more fun with it. So I told the little Mr. that if he did a good job then we could make him a kitchen during little brother's nap that afternoon.
He was most definitely on his best behavior! As soon as the little fellow was down, we jumped right in and got to work. We still had a couple of moving boxes left in the garage, and we took them apart and turned them inside out so all of the print would be hidden. Add plenty of clear packing tape, a few old CD's, a couple of milk lids (I'll add more as we collect them, which should only take a few days in this house), some twist ties, and a little paint marker, and ta-da! Instant oven.

Cooking commenced immediately.

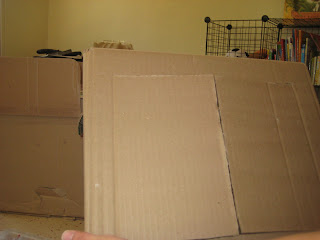
Next we made the sink cabinet. Here are the action shots that my 3-year-old took of the process:

Later we picked up a plastic bowl and a frying pan from the dollar store, and we were all set.

Of course the kitchen was not complete until it had a refrigerator, and my little chef did not let me forget it. Luckily I found two diaper boxes that fit together just right, so we added that to the array the next day. Here is our finished kitchen!

The little Mr., his little brother, and their cousins cooked up a storm all weekend. I would say that my total time investment was maybe an hour, and the total cost was $2, approximately 1/60 of the cost of the fancy new play kitchen. And we love this one more because we made it together.
He was most definitely on his best behavior! As soon as the little fellow was down, we jumped right in and got to work. We still had a couple of moving boxes left in the garage, and we took them apart and turned them inside out so all of the print would be hidden. Add plenty of clear packing tape, a few old CD's, a couple of milk lids (I'll add more as we collect them, which should only take a few days in this house), some twist ties, and a little paint marker, and ta-da! Instant oven.

Cooking commenced immediately.

Next we made the sink cabinet. Here are the action shots that my 3-year-old took of the process:


Later we picked up a plastic bowl and a frying pan from the dollar store, and we were all set.

Of course the kitchen was not complete until it had a refrigerator, and my little chef did not let me forget it. Luckily I found two diaper boxes that fit together just right, so we added that to the array the next day. Here is our finished kitchen!

The little Mr., his little brother, and their cousins cooked up a storm all weekend. I would say that my total time investment was maybe an hour, and the total cost was $2, approximately 1/60 of the cost of the fancy new play kitchen. And we love this one more because we made it together.

Subscribe to:
Posts (Atom)